Small Changes can make a huge impact
Clearly, small changes can often make a significant impact on a room or a home. While decorating or arranging or rearranging can completely transform a room, it's often just as likely that minimal changes will bring about the big "impacts" as well. Please take a few moments to peruse this page and see a small sampling of some of those room painting ideas and small changes/big impacts that I've created:
From this....
|
..to this
|
FROM UGLY TO LOVELY:
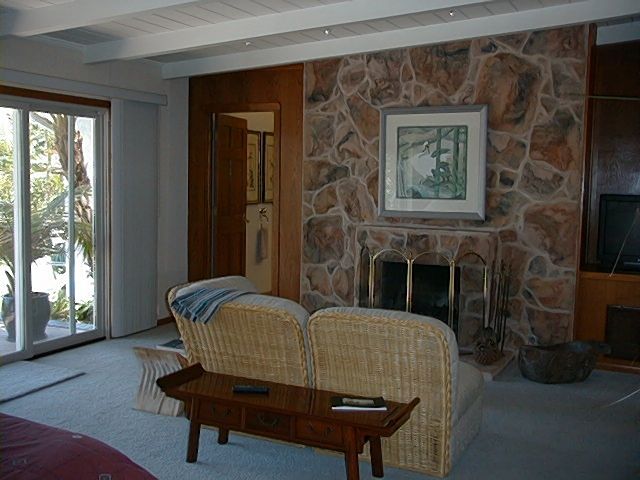
In the photo on the right, you'll see part of the room that needed to be redesigned. The owners wanted a cleaner, lighter feel to this master suite instead of the heavier, darker and more traditional look that existed. Three of the bedroom walls were covered in a dark paneling but fortunately, two of the walls had windows. If you look to the left of the first photo, you can partially see the wall that's called a "window wall" meaning that near floor to ceiling windows make up that particular wall.
The dark paneling combined with the overpowering (and very rustic) fireplace dominates the room which the owners didn't like. My challenge was to make the fireplace less dominant (and less of the predominant and defining feature of the room) and somehow turn it into an asset instead of an eyesore. Also, this is a very large room and needed some texture or textural elements to give the room some warmth and interest.
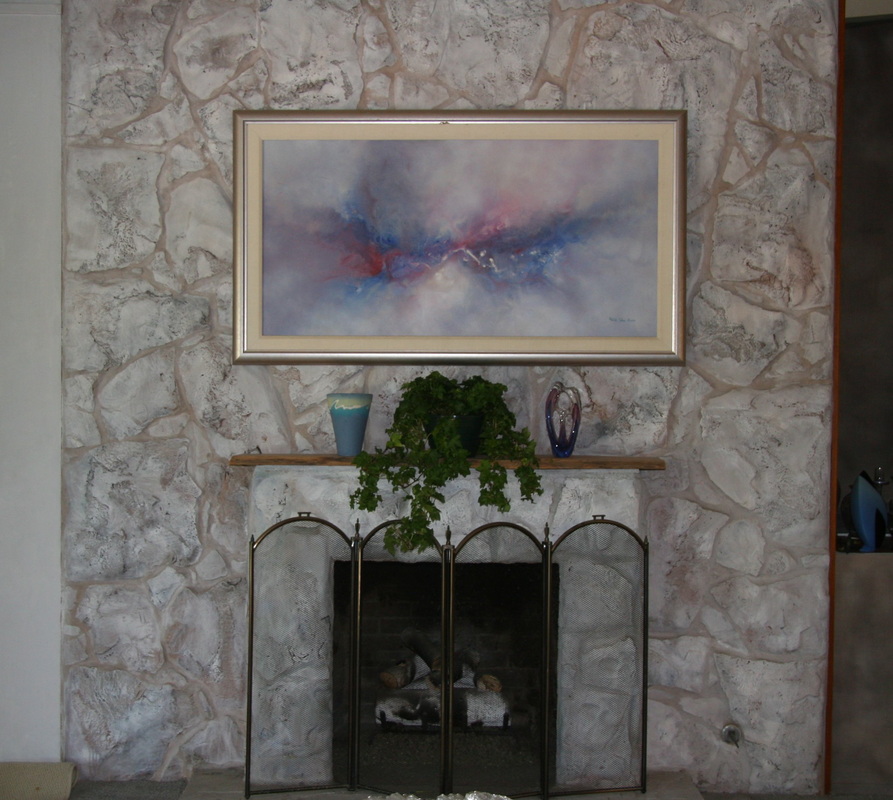
My solution to this design challenge was to paint the fireplace and minimize the amount of contrast that made it so prominent in the room. Although we primed the stone in the fireplace first, the stone was still too absorbent. Instead of applying a second coat of primer, we decided to use the absorbency to our advantage by using a sponge to help lightly create a whitewashed effect on the entire fireplace. Had we not done that and simply painted a few coats of white onto the fireplace, it would have lost much of its' textural impact.
The whitewashed effect that we did achieve in the photo to the right has a lighter, more natural look to it. It doesn't say, "I've been painted over". Instead, again, the results look more natural and almost intentional.
In the photo on the right, you'll see part of the room that needed to be redesigned. The owners wanted a cleaner, lighter feel to this master suite instead of the heavier, darker and more traditional look that existed. Three of the bedroom walls were covered in a dark paneling but fortunately, two of the walls had windows. If you look to the left of the first photo, you can partially see the wall that's called a "window wall" meaning that near floor to ceiling windows make up that particular wall.
The dark paneling combined with the overpowering (and very rustic) fireplace dominates the room which the owners didn't like. My challenge was to make the fireplace less dominant (and less of the predominant and defining feature of the room) and somehow turn it into an asset instead of an eyesore. Also, this is a very large room and needed some texture or textural elements to give the room some warmth and interest.
My solution to this design challenge was to paint the fireplace and minimize the amount of contrast that made it so prominent in the room. Although we primed the stone in the fireplace first, the stone was still too absorbent. Instead of applying a second coat of primer, we decided to use the absorbency to our advantage by using a sponge to help lightly create a whitewashed effect on the entire fireplace. Had we not done that and simply painted a few coats of white onto the fireplace, it would have lost much of its' textural impact.
The whitewashed effect that we did achieve in the photo to the right has a lighter, more natural look to it. It doesn't say, "I've been painted over". Instead, again, the results look more natural and almost intentional.
Faux Finishing/Fooling the eye:
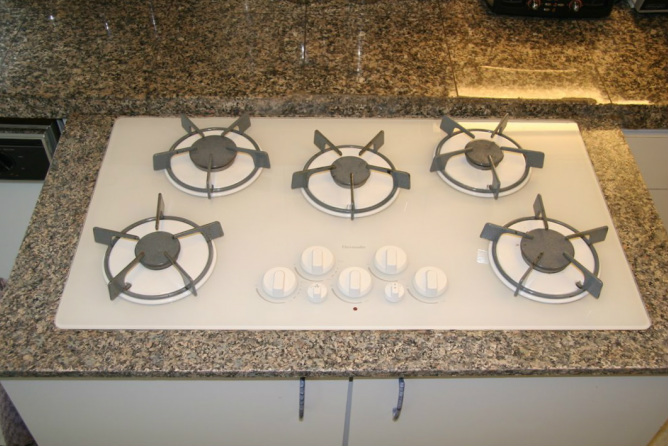
This was an especially challenging design problem. This stove top and cabinet was put in new after the previous very old stove top was removed. The original was built awkwardly and extended out into the long, narrow kitchen blocking entry into the pantry. Once it was removed, this cabinet and stove top was put in place until the new owners could do a whole house renovation. The challenge was to try and make it look like a part of the existing kitchen.
The owners had this unit installed using plain wood around the stove top as a temporary solution. To make matters worse, when it was installed, some of the original granite chipped on the counter top. While I typically don't offer faux finishing services myself, I took exception in this unusual case and painted the plain wood area around the stove to match the granite. Yes, that's a painted granite look surrounding the stove top itself. I also painted the area directly behind the stove top where the granite had been broken off to make it blend in again.
The owners had this unit installed using plain wood around the stove top as a temporary solution. To make matters worse, when it was installed, some of the original granite chipped on the counter top. While I typically don't offer faux finishing services myself, I took exception in this unusual case and painted the plain wood area around the stove to match the granite. Yes, that's a painted granite look surrounding the stove top itself. I also painted the area directly behind the stove top where the granite had been broken off to make it blend in again.
The complete kitchen and stove top view:
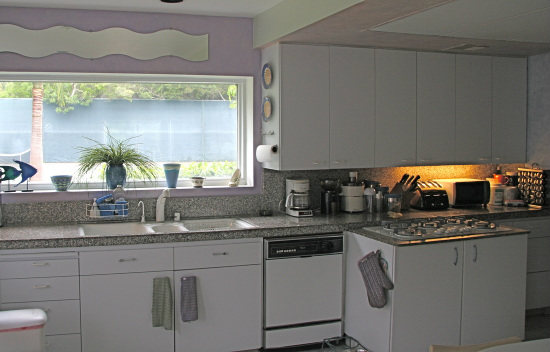
This photo gives you a much better idea of this stove top solution and how it provided a temporary solution to a rather difficult and unusual home decor challenge. To the right of the stove top is a very dark walk-in pantry whose entry was seriously blocked by the previous stove. Not only did we improve traffic flow but we did it decoratively as well.
Quick Fix To Hide Wood Paneling:

This master bedroom was covered in dark teak paneling that was actually quite lovely and warm but it closed in the room too much and made it a very dark space. The design challenge was to help make the room appear lighter without either removing or painting over the paneling. The other challenge was to choose a design solution that would coordinate with the playful and bright bed comforter the owner had already chosen.
My solution was to put up a curtain rod attached to the ceiling beam and hang color coordinated curtain panels. We choose both lilac and sage green curtains along with several matching pillows to tie the entire ensemble together. Another important feature of the curtain solution was that I choose curtain panels with a reflective sheen in them to help reflect the light that already came into the room. The overall effect was to lighten the room (by picking mid tone shades lighter than the paneling) by using a design solution that didn't fight the paneling but rather, coordinated with and complimented it.
My solution was to put up a curtain rod attached to the ceiling beam and hang color coordinated curtain panels. We choose both lilac and sage green curtains along with several matching pillows to tie the entire ensemble together. Another important feature of the curtain solution was that I choose curtain panels with a reflective sheen in them to help reflect the light that already came into the room. The overall effect was to lighten the room (by picking mid tone shades lighter than the paneling) by using a design solution that didn't fight the paneling but rather, coordinated with and complimented it.
CALL 858-551-0227 FOR A FREE TELEPHONE CONSULTATION FOR SAN DIEGO RESIDENTS